Your Weather station
Your weather station is complete? Is it up and running? This page is meant for those of you that have successfully finished the guides featured on this site. I would love paste links to your websites, so other people can see it as well. It would be especially interesting if you managed to add some features of your own and if you were able to improve any part of this project. Send me an email to [email protected], provide a link to your Pi and I will post it here. If you want, you can leave a comment below, either will be fine. Just don’t be shy :). It’s time to show the world that you’ve built your weather station.
One of the best variations of this project was built by Alonso Arteaga. He used the same sensors but different tools. Anyone that is interested in using Elasticsearch with the combination of Kibana, really has to check out his tutorial. He’s planning on adding even more things such as Nest integration, openweathermap.org and more. I highly recommend you take a look at his project. Next contributor is Simon P. He has completed this tutorial in only a few days after purchasing his first Raspberry Pi. Simon also noticed a bug in the WordPress plugin and was kind enough to notify me about that and proposed a solution as well – Thanks for that! He is still doing some work on his website, but you can take a look at it on webpage.
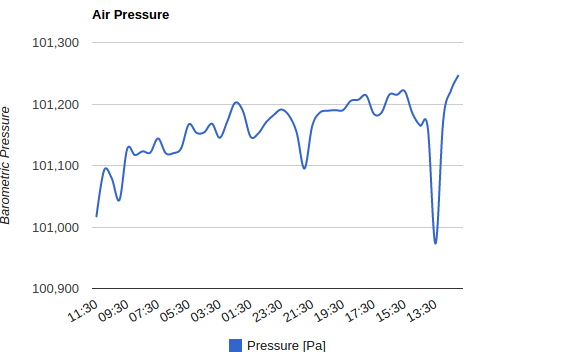
 Alessandro Catorcini has also successfully completed this project. You really should check out his page, which is available on http://weather.catorcini.com/. He has greatly improved the starting code explained on this page. He has added an air pressure sensor and even modified the code to work with the new additions. Details for this expansion are explained here.
 I got lots of help from Stefan Mayer who was really kind and made quite a few fixes to the WordPress plugin. He has decided to build his own worm farm by following an article from 1981 and adding some technology to it. Take a look at his interesting project on http://www.2komma5.org/klima-daten-heute. The page is still being updated, but use Google translate, it’s an interesting read! His github username is mayerst, do take a look at his other code.
Wayne from Down under also finished the project and improved it. Take a look at his work at http://thedickersons.id.au/Weather/. In case you’re wondering, he is using High Charts to display the readings on a WordPress page. The station itself is hosted in a really professional looking enclosure. Definitively a must see! Wayne has also added a camera that takes pictures every few minutes. Read more about the build http://5ddesign.com.au/2017/06/30/weather-station-update/. Also, take a look at his timelapse https://youtu.be/TArWMfJtbN0.
I got lots of help from Stefan Mayer who was really kind and made quite a few fixes to the WordPress plugin. He has decided to build his own worm farm by following an article from 1981 and adding some technology to it. Take a look at his interesting project on http://www.2komma5.org/klima-daten-heute. The page is still being updated, but use Google translate, it’s an interesting read! His github username is mayerst, do take a look at his other code.
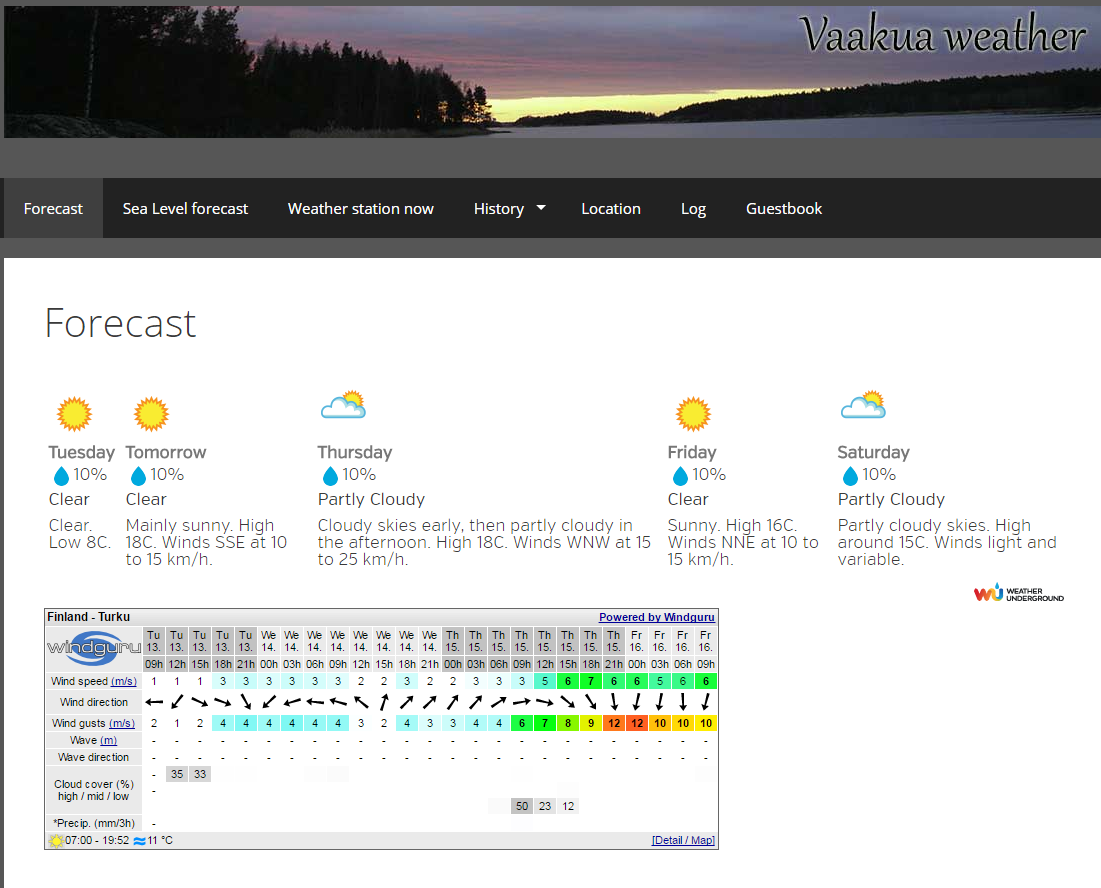
Wayne from Down under also finished the project and improved it. Take a look at his work at http://thedickersons.id.au/Weather/. In case you’re wondering, he is using High Charts to display the readings on a WordPress page. The station itself is hosted in a really professional looking enclosure. Definitively a must see! Wayne has also added a camera that takes pictures every few minutes. Read more about the build http://5ddesign.com.au/2017/06/30/weather-station-update/. Also, take a look at his timelapse https://youtu.be/TArWMfJtbN0. I was contacted by Vesa from cold Finland. His weather station is using a mobile broadband router. To preserve batteries the router uploads the collected data between 12:00 and 21:00. The site itself is hosted on an Amazon AWS virtual server. The site is available on vaakua.dy.fi. Let’s see how low the temperatures go in the near future.
 Chris from the Royal Meteorological Society contacted me about a competition he is sponsoring.Take a look at the website for more information. He and his students are planning to use this tutorial to create a meteorological station and send it up into the sky. Can’t wait to see some pictures. More information on the project is also available on https://balloonnews.wordpress.com/.
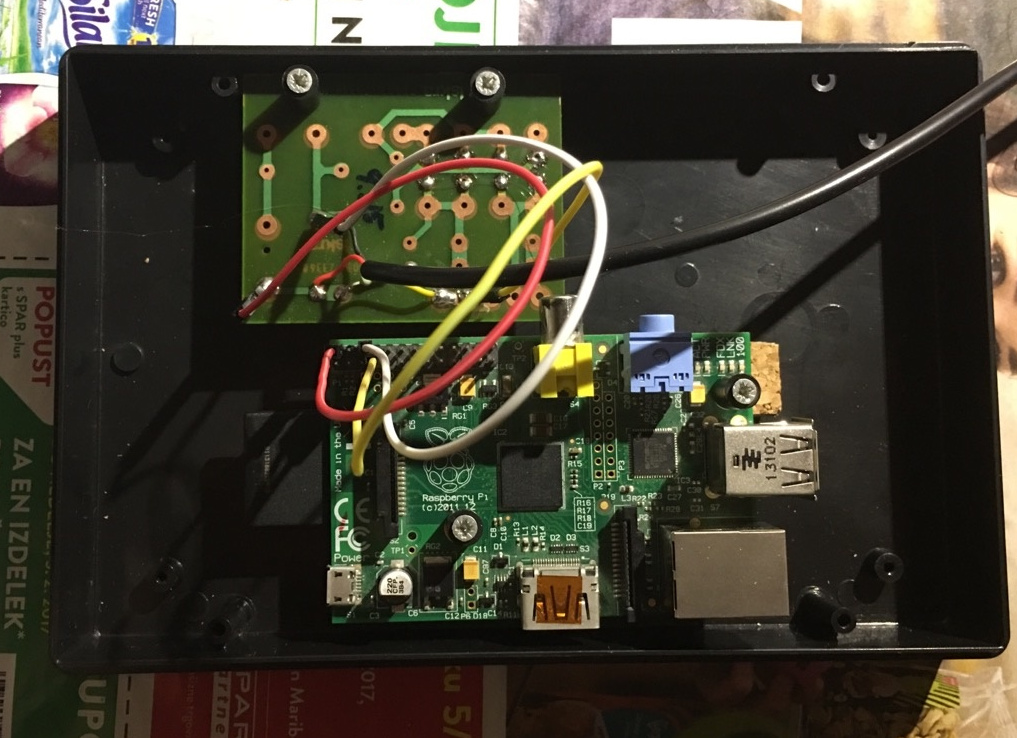
Uroš improved the wiring so the whole package fits into a neat little box. Visit http://morava.benkic.eu/ and take a peek at the readings. Raspberry Pi and sensors are placed outside, under the roof where it’s safe from rain. Good job!
Chris from the Royal Meteorological Society contacted me about a competition he is sponsoring.Take a look at the website for more information. He and his students are planning to use this tutorial to create a meteorological station and send it up into the sky. Can’t wait to see some pictures. More information on the project is also available on https://balloonnews.wordpress.com/.
Uroš improved the wiring so the whole package fits into a neat little box. Visit http://morava.benkic.eu/ and take a peek at the readings. Raspberry Pi and sensors are placed outside, under the roof where it’s safe from rain. Good job!
 First contribution from Netherlands! Jacob finished building his station which is available on http://jacoblieben.nl. You can even toggle the languages in the upper right corner.
 Angelo’s weather station is not publicly available, but he was kind enough to upgrade the code and made a nice enclosure for the weather station. His code uploads the readings to Weather Underground, check his code out on Github.
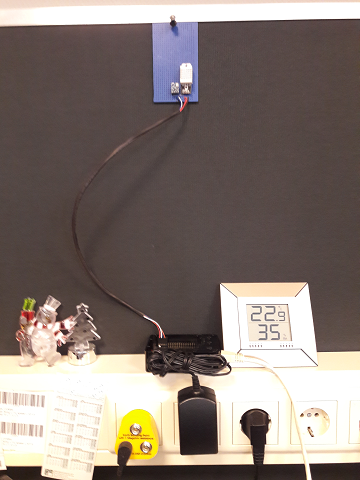
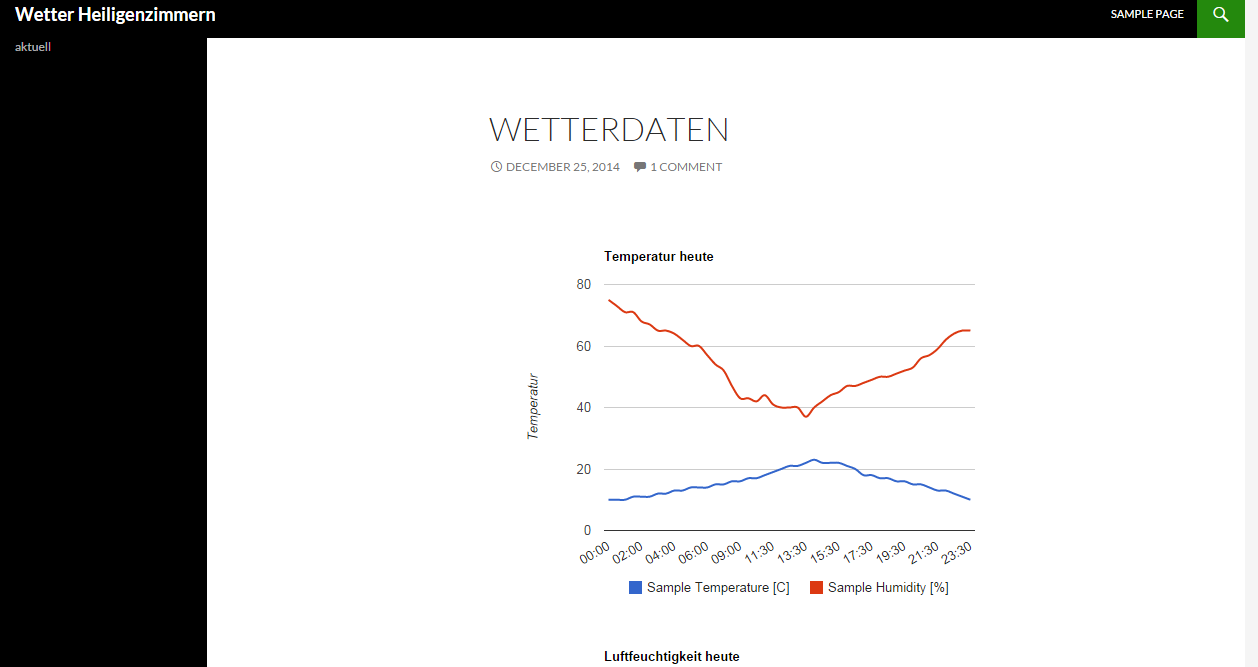
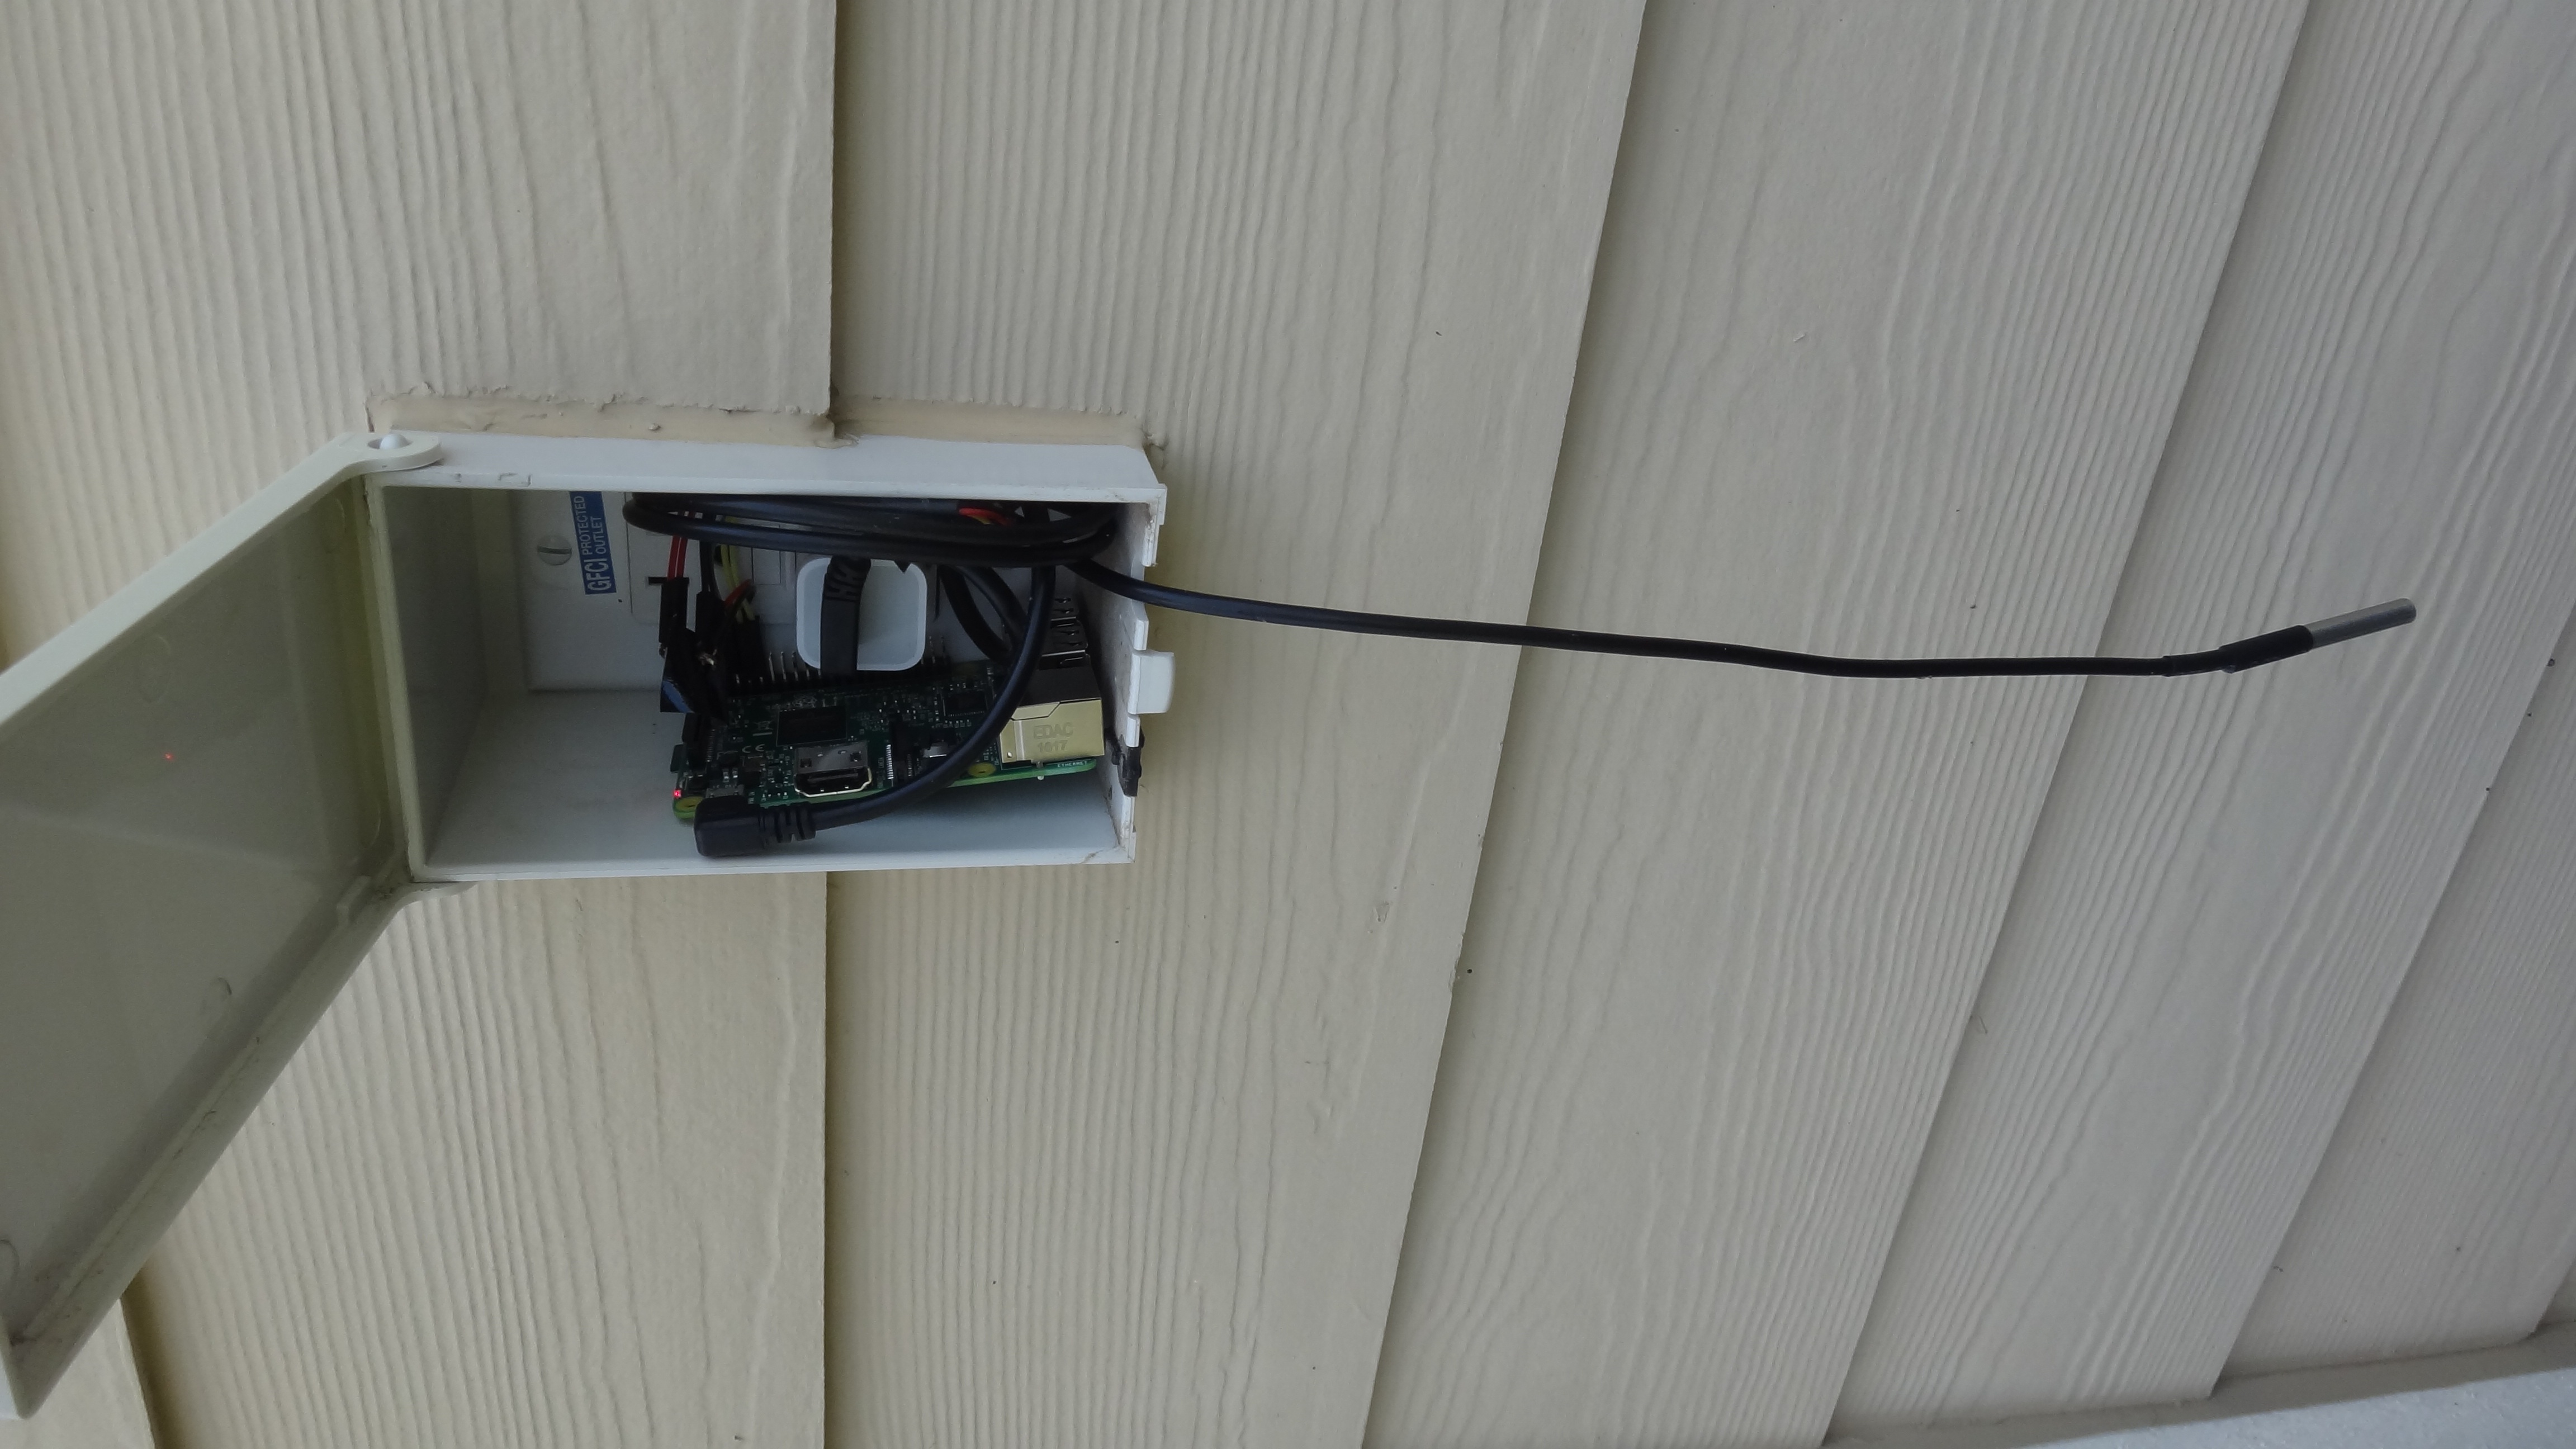 From Isernhagen, Germany comes another successfully built station. Made by Adrian Togoe, his station is working hard to gather all the temperature readings. His site is not publicly available, but he was kind enough to send some screenshots. Adrian can’t wait to add more functionalities to his Pi. I have suggested PiVPN for starters.
 Marco from the Netherlands sent me the following snap. He’s using AM3202 sensor which is currently located above his computer.