

Wiring for DS18B20
This part covers the wiring for DS18B20, the more accurate and waterproof temperature sensor. As stated before, its weakness is that it lacks the power of reading humidity. Otherwise, it is much more accurate, reliable and has no problems with the WordPress plugin, that displays the readings.
Different from DHT22, this sensor has only three wires. Start with putting the breakout kit on the breadboard and connect the wires as shown in the diagram below. Please make sure that the three wires from DS18B20 are connected to the breadboard! Be extra careful to set them in the correct order. If you mix it up, the sensor is supposed to get warmer until it reaches it’s maximum temperature and starts to break. 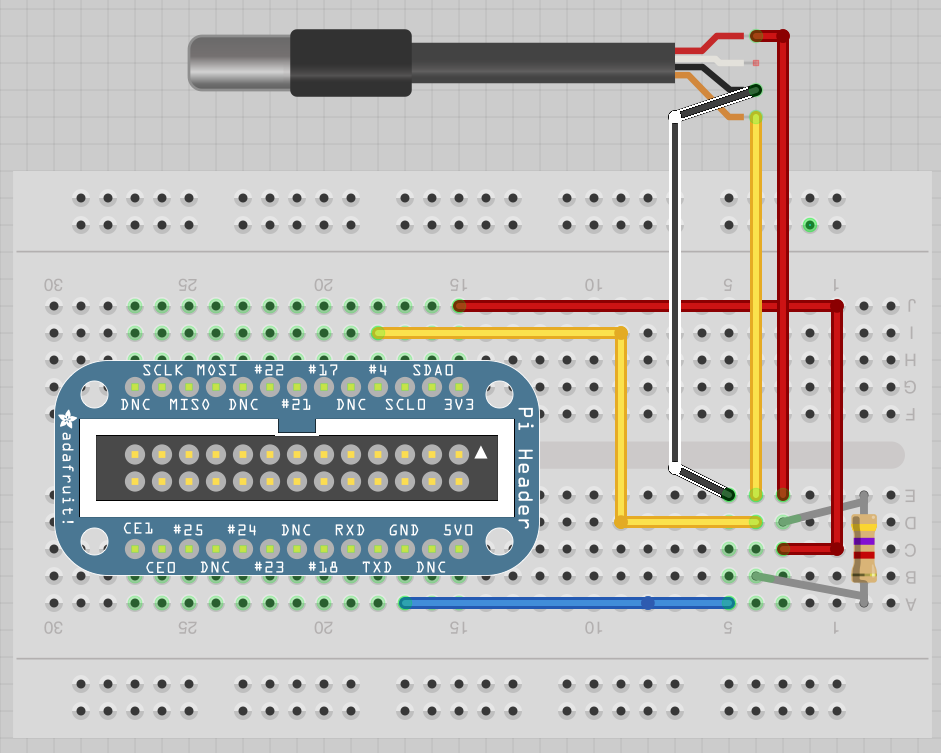
modprobe w1-gpio and then modprobe w1-therm. Change directories with cd /sys/bus/w1/devices and display the folder contents with ls command. It should display one folder that starts with 28, in my case it’s 28-000004a78c7f. Go to that directory by cd 28-********* (replace the * with the correct identifier of the sensor). The temperature is stored in a file, print it out with cat w1_slave. You should get something like in the picture below. The temperature is displayed in 1/000 degrees C.

Use the python code to get and save temperature, more information here
Raspberry Pi has changed a few things in January 2015. The latest firmware includes Device Tree support, which breaks readings from some sensors. Solve this issue by typing in nano /boot/config.txt. Scroll down to the bottom and add the following line dtoverlay=w1-gpio-pullup,gpiopin=4. More information is available here.