Set a static IP
By default, Raspberry Pi uses DHCP to get an IP assigned. That is okay, but the assigned IP can change over time or after powering off. This will cause problems when you need to remotely access your device. It is even harder to forward ports on your router if the IP keeps on changing. Therefore it is more than wise to assign a static IP to your device. The IP will remain the same and you will be able to use ssh and VNC with the same settings over and over again.
Type innano /etc/network/interfaces. This will open the network settings. By default, it should look something like this:
auto lo
iface lo inet loopback
iface eth0 inet dhcp
allow-hotplug wlan0
iface wlan0 inet manual
wpa-roam /etc/wpa_supplicant/wpa_supplicant.conf
iface default inet dhcp
In order to set up a static IP, you need to replace dhcp with static and a few new lines afterward. Type in the static IP for the device, you should get something like this:
auto lo
iface lo inet loopback
iface eth0 inet static
address 192.168.1.146
netmask 255.255.255.0
network 192.168.1.1
broadcast 192.168.1.255
gateway 192.168.1.1
allow-hotplug wlan0
iface wlan0 inet manual
wpa-roam /etc/wpa_supplicant/wpa_supplicant.conf
iface default inet dhcp
Your gateway and netmask may be different, so change them accordingly. To make sure, you can check the current settings by typing ifconfig in the console. You should also reboot and try out the new IP with putty. If you decided to purchase the Wifi dongle, the process is similar, below is the sample configuration
auto wlan0
allow-hotplug wlan0
iface wlan0 inet static
address 192.168.1.146
netmask 255.255.255.0
gateway 192.168.1.1
wpa-passphrase pass
wpa-ssid ssid
wireless-channel 6
#wpa-roam /etc/wpa_supplicant/wpa_supplicant.conf
iface default inet dhcp
And reboot.
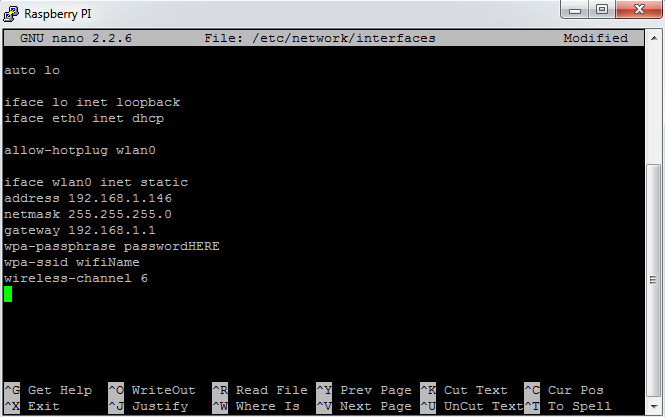 Next to wpa-passphrase you need to type in the password for your Wifi, next to wpa-ssid type in the name of your Wifi and after wireless-channel you have to put in the channel that your Wifi is broadcasting on. If you are having difficulties with this, connect to your router and try to get the appropriate information.