Speed up WordPress
Raspberry Pi is incredible for many reasons. Sadly it does lack a bit of horse power. But that can be fixed with some plugins for caching. For example, when a new visitor comes to your page, he is served a html page that has been prepared beforehand. That way, the page does not have to be generated for each visit. This does not happen for logged in users, such as the site administrator. Other users will get a cached html page which will be displayed much faster. This way you will not lose impatient visitors to your site, so it’s a pretty good thing to do.
My plugin, that displays the measurements, relies on one specific plugin – Quick Cache. I have chosen this particular plugin because of its simplicity to set up. You can use other plugins, but you will have to modify my plugin. If you do not, then the graph will display cached values, which is not good. If you decide to use Quick Cache, you should not have any problems. It contains one line that prevents Quick Cache working on pages that display the measurements graph.
To install Quick Cache, go to your dashboard, plugins and select add new. Search for Quick cache, install it and activate it. Your dashboard menu will have another entry called Quick Cache, choose config options. The setup itself is really simple, there are only two things you need to change. First, enable quick cache by clicking on Enabled. In cache expiration time, you can set how long you want to keep the cached files. I myself have chosen to use 604800 seconds. This means that the cache will be automatically deleted in 7 days. You can use a shorter time if you wish, it’s up to you. Do not forget to save the new settings.
Now you have to test if caching is working. Log out from your page or open it with another browser. When you visit a page for the first time, its cached page will be generated. View the source (usually with ctr+u) of the page. In the bottom, it must contain something similar to the picture below. 
This comment gives you some information. The most important thing is when it was generated and when it will expire. Great, the plugin is working. Your page will be displayed much faster, that should help to prevent visitors from closing the tab while the page is still loading. You are not obliged to use this plugin, but otherwise, the page loads really slow as you have probably already seen yourself.
Extra speed
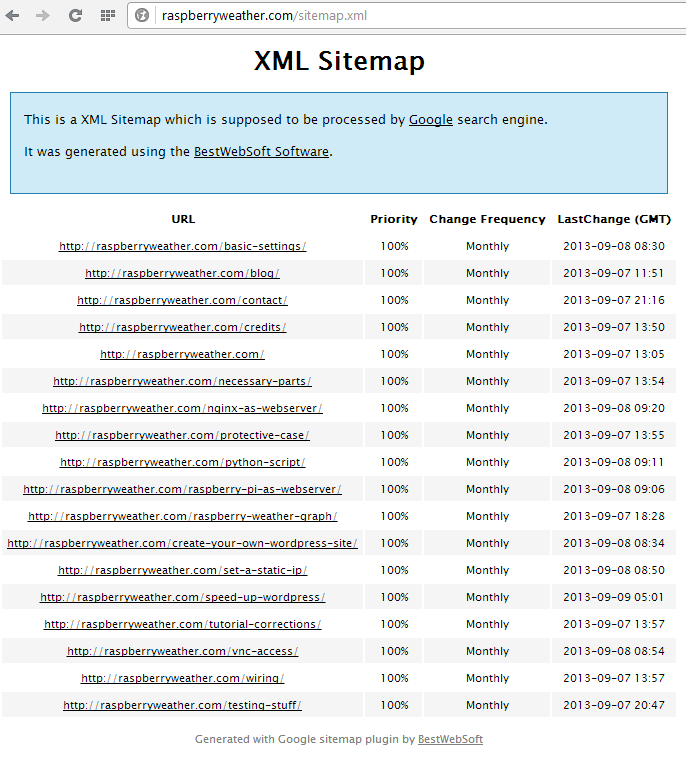
After installing and confirming, that this plugin indeed does work, you can take another step. Let’s look at an example. If a page is not cached, then the very first visit to a certain page will trigger the process. This means he will have to wait for the cache to be generated and displayed. You can bypass this waiting by visiting the page yourself. To avoid manual work, I’ve created a simple script, that does that instead of you. First, you need to create your sitemap. I recommend the Google sitemap plugin, that has been tested multiple times with the python script. Install it and it should place your sitemap somewhat like this raspberryweather.com/sitemap.xml. If you will not be using a domain, it will look something like this 93.103.76.43/sitemap.xml. Either way, get the correct url by clicking on settings in the plugin list. The Google sitemap plugin will open and your sitemap xml is displayed in the end of the second paragraph. Copy it. You should also install cURL so this sitemap will be built automatically. Do this with thesudo apt-get install php5-curl command. Do not forget to restart Apache with sudo service apache2 restart.
 The script you will download relies on two modules – mechanize and BeautifulSoup. These two help the script surf the web and parse out links. You will need to install them with the command
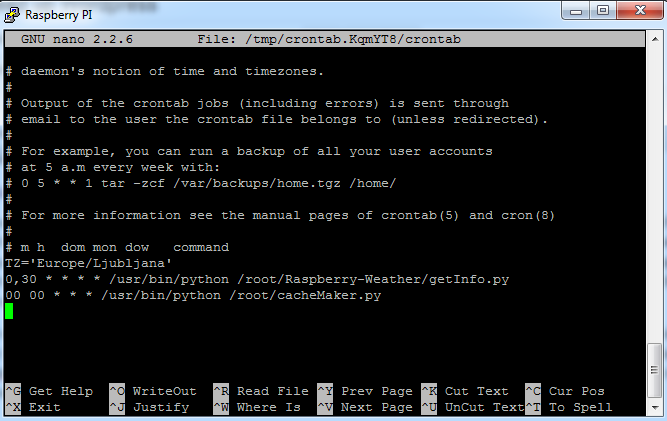
 easy_install BeautifulSoup and apt-get install python-mechanize. Now you are ready to download the script with wget https://raw.github.com/peterkodermac/Cache-maker/master/cacheMaker.py. Remember the sitemap link from before? You will have to insert it into the script. Start editing the script with nano cacheMaker.py. Look for the sitemapUrl variable, remove the contents (not the two ” symbols). Put your sitemap inside and save with ctr+x.
Test out the script with python cacheMaker.py. If it outputs pages from your site telling you that they were visited, its working nicely then. You can check the folder /var/www/wp-content/cache if it contains cache files for all of those pages. You can even remove them all, let the script run again and double check. Add this script to crontab with crontab -e. I want to have it run every day at midnight so I put in 00 00 * * * /usr/bin/python /root/cacheMaker.py. Double check for the path to the script and take a look at the cache tomorrow morning.
 If you’re planning on using Google analytics, such nightly visits will give you false information. You can exclude your own IP so it will not appear on the Google Analytics statistics. Log in to Google Analytics, select your page and then Admin in the right upper corner. Look for filters in the right part of the screen and click on add filter. Choose the predefined filter, traffic from IP and type in your IP. Save the configuration and you’re good to go!