Raspberry PI as webserver
It’s time to create your own Raspberry pi webserver. It will enable you to display the measurements on your site. To achieve this, you need to first install Apache. There are other options that you can use instead of Apache, but I found it the easiest to set up because of Quick Cache.
For starters, you need to install Apache. Issue the following command sudo apt install apache2 php php-mysql libapache2-mod-php.Now is the time to install the MySQL server and client. Do that with the command sudo apt-get install mysql-server mysql-common mariadb-client. You will set up a password later on. Give it a few moments and you are ready for a test. Get your device IP with ifconfig and paste it in a browser. You should be greeted with a html page telling you that Apache is up and running. After this confirmation remove the index.html file because it can cause problems when installing WordPress. Delete it by rm /var/www/html/index.html.
cd /var/www/html. You will download WordPress and set it up – download the latest version with wget http://wordpress.org/latest.zip. To unzip it, type in unzip latest.zip. The WordPress files are now in a subdirectory, move the contents with mv wordpress/* . . To remove the now empty WordPress directory you have to rm -rf wordpress.
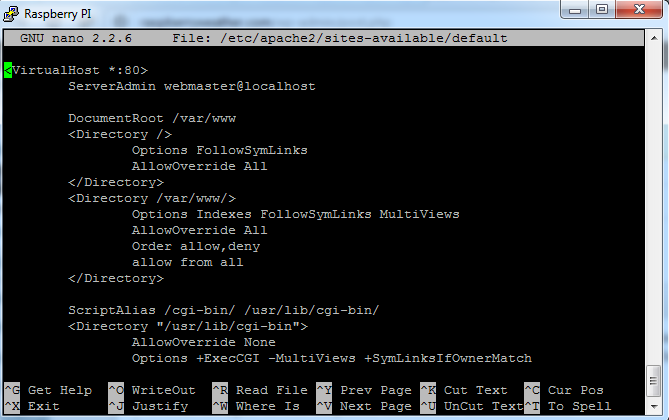
You will have to modify the permissions for WordPress. If you do not do that, WordPress cannot install plugins among other things. To do that, type sudo chown -R www-data:www-data /var/www. It is recommended that you use pretty permalinks on WordPress sites, to avoid future problems with these settings (for example 404 errors), you need to use mod_rewrite. Type in a2enmod rewrite and confirm. Now edit the default settings nano /etc/apache2/apache2.conf. Look for the first two AllowOverride. You need to set them from None to All. But change only the first two AllowOverrides! Restart Apache, so that the new settings come in use – /etc/init.d/apache2 restart. Your Raspberry pi webserver is nearly ready!